Google Analytics 4 (GA4) provides deep insights into user behavior across various devices and platforms. GA4 has been designed keeping in mind privacy and cross-platform measurement, to meet modern businesses’ needs to understand user interactions. GA4 leverages ML to offer predictive metrics & help businesses understand their customers better. Its event-based tracking system marks a significant shift from the traditional page-view focused model, highlighting Google’s commitment to evolving and adapting to the changing digital environment. GA4 marks a forward leap in digital analytics, tailored to aid businesses in navigating through the digital landscape.
Google is now advising website owners to upgrade to Google Analytics 4 because the previous Universal Analytics will be phased out on July 1, 2023. You will no longer be able to track new data in the older version after the sunset day. If you are not aware of this yet, it is better to hire an experienced SEO agency to set up Google Analytics 4 for WordPress websites.
Before you set up Google Analytics 4 for WordPress, you should understand the value of having analytics on your WordPress site. Analytical data and traffic numbers from your website can provide you with insights into a variety of numbers that can be used for marketing, interaction, SEO, social media, and other purposes.
If you are using a website maintenance package from a reputed company then this change could be included in your website maintenance cost.
We will show you how to easily switch to Google Analytics 4 for WordPress and save time and for your business.
Also, Read: 15 Essential Digital Marketing Tools For An Internet Marketer
Why Should You Use Google Analytics 4?
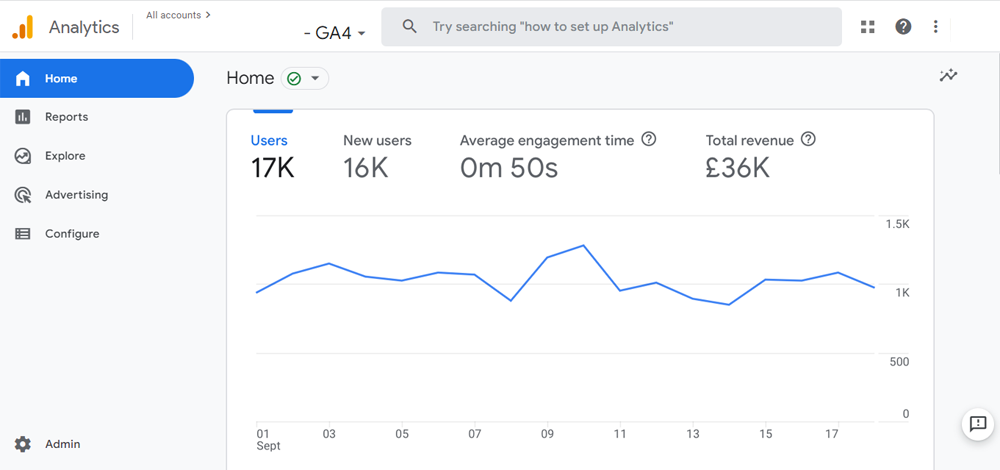
Google Analytics 4 (GA4) is the latest version of the data tracking software. It allows you to track mobile apps and websites in the same account and includes new metrics, reports, and tracking features.
If you have not yet created a GA4 property, now is the time to upgrade to the latest version. This is due to Google’s announcement that the old Universal Analytics will be decommissioned on July 1, 2023. This means that Universal Analytics will no longer receive data from your WordPress website after the sunset date, and it will eventually cease to function. That means you might lose all of your previous analytics data.
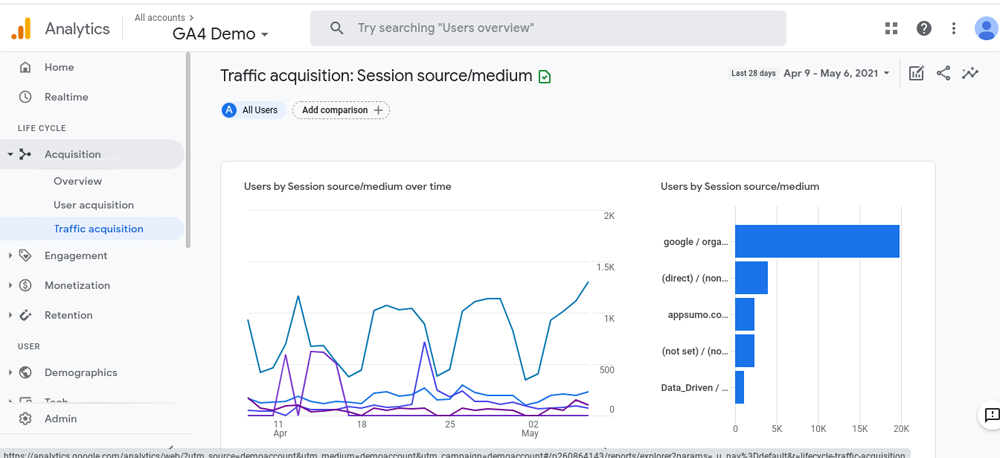
Moving to Google Analytics 4 as soon as possible will save you from having to start from scratch with no historical data. To do this correctly, many wise website owners employ the dual tracking method, which allows you to continue using Universal Analytics while sending data to GA4.
This way, you can future-proof your data while also giving yourself plenty of time to become acquainted with the new Google Analytics dashboard and features.
That being said, let’s look at how to use Google Analytics 4 with dual tracking in WordPress.
Integrate GA4 into WordPress
Step 1: Go to Your Google Analytics Account
Begin the process by going to the Google Analytics homepage and logging in with your Google account. This allows you to access your dashboard, and we can proceed from there.
Step 2: Create a New Google Analytics 4 Property
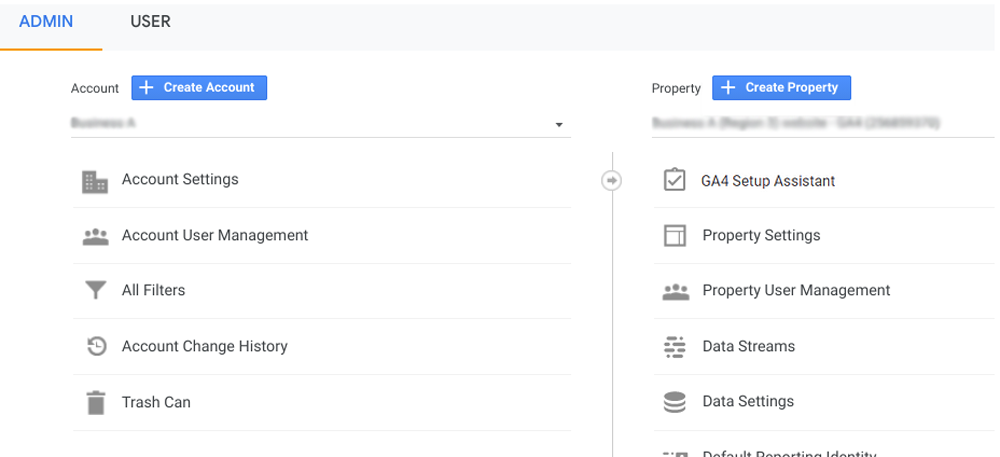
You want to create a new GA4 property now that you are in your Analytics dashboard. You can either click Admin > Create Account or choose an existing account to which you want to add your new property.
Because we are assuming you already have a Google Analytics account, we will simply click “Create Property” on an existing account.
Step 3: Enter All Property Information
When you click the “Create Property” button, you will be taken to the Property Details page. You can enter all relevant property information here.
Go ahead and name your property, report a time zone, and include any other pertinent information. You configure this as you see fit.
Google Analytics 4 property information
When you are finished, click the “Next” button to proceed. This narrows it down to a few more details you may want to include. This includes the size of the company and a few other questions. Fill in the blanks as you see fit.
When you are done, go to the bottom of the page and click the “Create” button.
Step 4: Choose the “Web” option
You should now be on the “Data Streams” page. You will notice that there are three options available. Apps for iOS, Android, and the web are available. Choose “Web.”
Step 5: Configure Web Stream
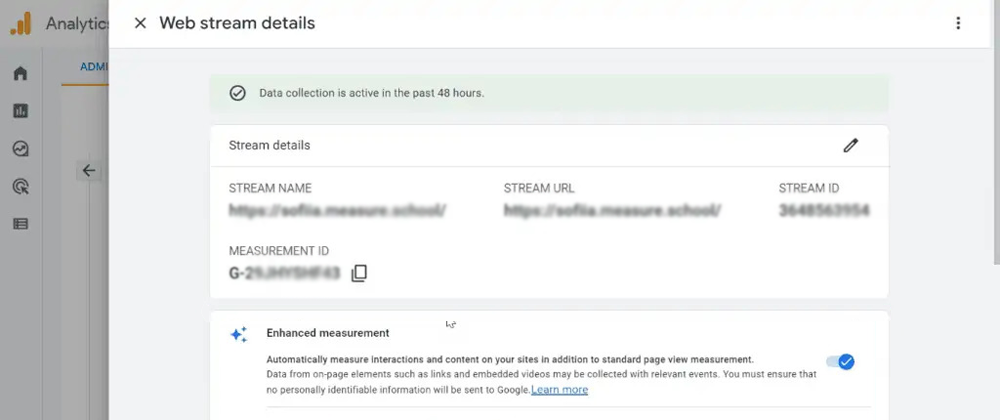
When you select the Web option, a screen appears that allows you to configure your web stream. Fill out all of the necessary information to create the stream. This includes adding your URL, naming your stream, and adding or removing any enhanced measurements you desire.
When you are finished, click the “Create Stream” button.
Step 6: Connect Your Existing Analytics Property to GA4
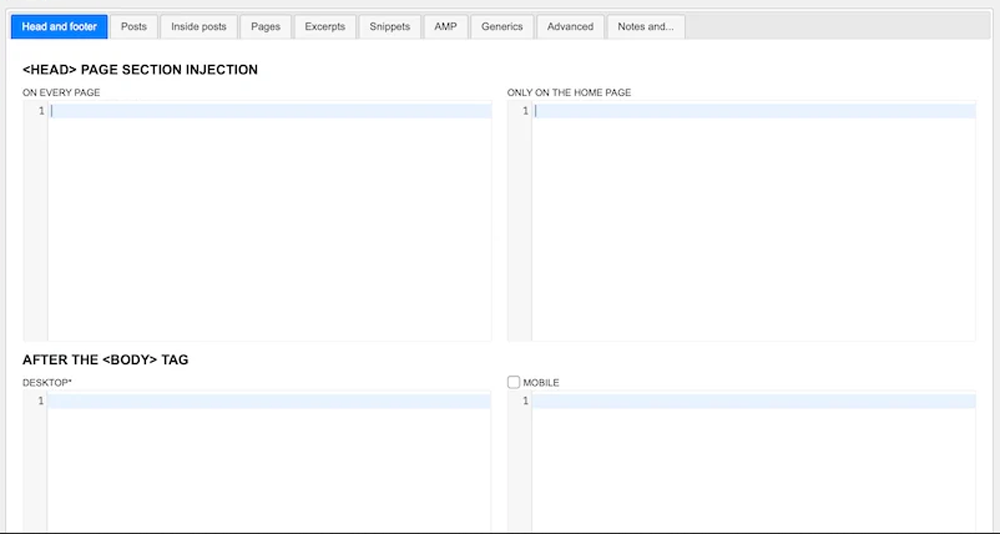
Return to your existing UA property by clicking the Admin button and then selecting it from the drop-down menu.
Choose Google Analytics 4 property from the dropdown menu.
- Now, select “Tracking Info” from the dropdown menu and enter the “Tracking” code.
- The tracking information is followed by the tracking code.
- Copy your tracking code from the screen that appears so that you have it. Take note of the tracking code.
- Finally, return to your new GA4 Property by selecting it from the drop-down menu. Then, on the above-mentioned stream, look for “Connected Site Tags.” Simply click on it.
- Click on the associated site tags.
- Enter or paste the above-copied tracking ID, give it a nickname, and then click “Connect.”
- Enter your ID and nickname, then click Connect.
Step 7: Install Tracking Code on Your WordPress Website
You have now reached the final stage of the procedure. You must install the tracking code on your WordPress site before you can begin receiving all of the data and analytics provided by Google Analytics 4.
Select Global Tag from your web stream’s “Add new on-page Tag” option (gtag.js).
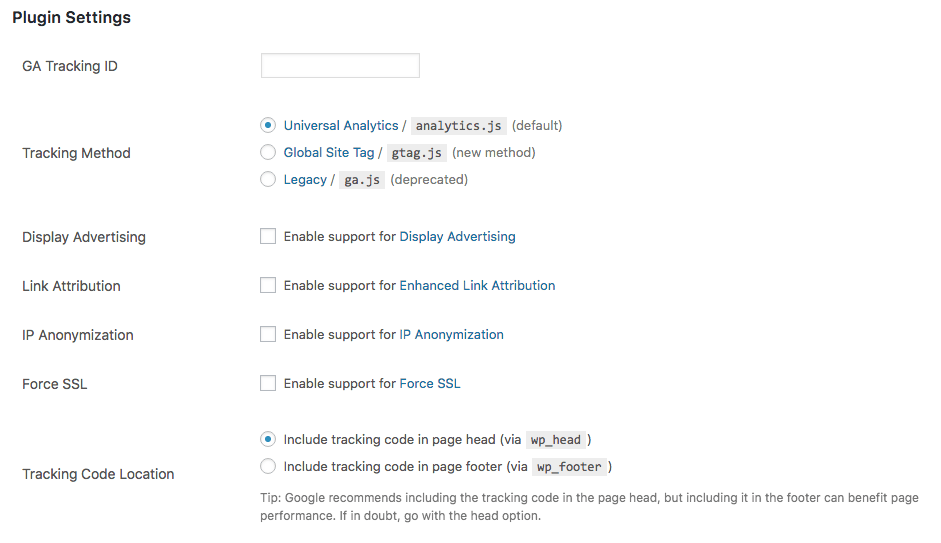
Take note of the tracking code. Now go to your website and paste the code there.
Please keep in mind that we are using a WordPress website in this instance. You can insert the code into your website’s “head” section. Again, you can add the code directly into the theme options, or you can use a plugin that allows you to easily add code to the head. Either way is acceptable.
Log in to your WordPress admin dashboard and paste the code described above into the head of your site. To save your code, click the “Save” button.
You can accomplish this by using a plugin such as Insert Header and Footer. This allows you to insert code directly into those WordPress sections. You can also manually insert the code into your site’s files.
That’s all. You should now have Google Analytics 4 running on your site, and you should start seeing data in your Analytics dashboard shortly.
Can I Use A Plugin To Add GA4?
Yes, there are several Google Analytics plugins available, and many of them now allow you to add Google Analytics 4 tracking options. The method you use will be determined by the plugin settings.
You can also try one of the following plugins to add GA4 to your website.
Also, Read: 66 Free SEO Chrome Extensions to Make Your SEO Work Easier
3 WordPress Plugins to Add GA4
HT Easy GA4 (Google Analytics 4)
The team at HasThemes has created the HT Easy GA4 (Google Analytics 4) WordPress plugin, which will come in handy, particularly if you are making the transition to GA4 (Google Analytics 4). It is the most recent version of the tool, allowing you to combine data from mobile apps and websites into a single GA Property.
MonsterInsights Google Analytics plugin
MonsterInsights is one of the best Google Analytics plugin for WordPress to connect Google Analytics 4. It enables you to easily connect your WordPress site to Google Analytics (both Universal Analytics and GA4), allowing you to view all of the most important data directly in your WordPress dashboard.
Furthermore, you can enable sophisticated tracking features such as event tracking, eCommerce tracking, form tracking, custom dimension tracking, outbound link tracking, and more with the click of a button.
ExactMetrics
ExactMetrics is a well-known Google Analytics plugin for WordPress sites. It is packed with features that will allow you to connect with Google Analytics and track the traffic to your website. As the name implies, it provides precise metrics to assist you in making the best decisions for your site. The tool can also help you add GA4 to your website and can be used for dual tracking.
It only takes a few mouse clicks. There is no need to hire a professional developer or change any code. This eliminates the need to manually enter your Google Analytics tracking code in order to connect your site. So, even if you’re a complete novice with no prior experience, ExactMetrics makes it simple to sync your website and begin collecting the data you need to grow your business.
Setting Up Dual Tracking With Universal Analytics
After setting up Google Analytics 4, the next step is to allow Universal Analytics to operate concurrently with your Google Analytics 4 property in WordPress.
It is simple to set up dual tracking and keep track of both properties at once without writing any code. However, you will need to use a plugin if you want to bypass the coding.
We advise deactivating Universal Analytics tracking code first if it has already been applied to your WordPress website. If not, it can result in double-tracking and bias your results.
- You may go to Insights » Settings in your WordPress admin panel and select the ‘General’ tab to begin correctly setting up dual tracking.
- After that, scroll down to the ‘Google Authentication’ section.
- Enter your Universal Analytics (UA) code now under the Dual Tracking Profile. Your UA code can be easily found in the Google Analytics Admin settings.
- Simply navigate to your Universal Analytics property’s Admin settings page in Google Analytics. Then, in the Property column, select ‘Property Settings.’
- The Universal Analytics Tracking Id should look something like this: UA-123856789-5
You have now completed the installation of dual tracking on your WordPress website.
Simply navigate to Insights » Reports to see how your website is performing. You will find all the information you need to make the best decisions for your website’s growth right here.
Conclusion
The Google Analytics 4 update is a significant update that will have a positive impact on the lives of marketers in a variety of ways. You can now choose when and how to use customer data to optimize ads. You can also restrict the use of data to only measurement purposes.
Overall, if used correctly, you should be able to meet all of your customers’ needs while also improving your products and overall marketing strategy. Anything that can be done to make the marketing process easier is always appreciated.
Frequently Asked Questions
Is Google Analytics 4 free?
Similar to Universal Analytics, Google Analytics 4 is a free property type. You will not have to pay anything for using one or more GA4 properties in your account.
How do I know if I have Google Analytics 4?
Check your property ID to see what kind of property you have. Property IDs in Universal Analytics begin with UA and end with a number (UA-XXXXXXXXX-1). The property IDs in Google Analytics 4 are only numbers (XXXXXXXXX).
Is Google Analytics 4 ready to be used?
Google Analytics 4 is Google’s next-generation measurement solution, replacing Universal Analytics. Standard Universal Analytics properties will stop processing new hits on July 1, 2023. If you still use Universal Analytics, we recommend that you prepare to switch to Google Analytics 4 in the future.
What is the difference between GA4 and ga360?
GA4 standard lets you make up to 200 exploration reports per user per property and 500 exploration reports per property that can be shared. GA4 360, on the other hand, lets you make up to 200 exploration reports per user per property and up to 1000 exploration reports that can be shared per property.
